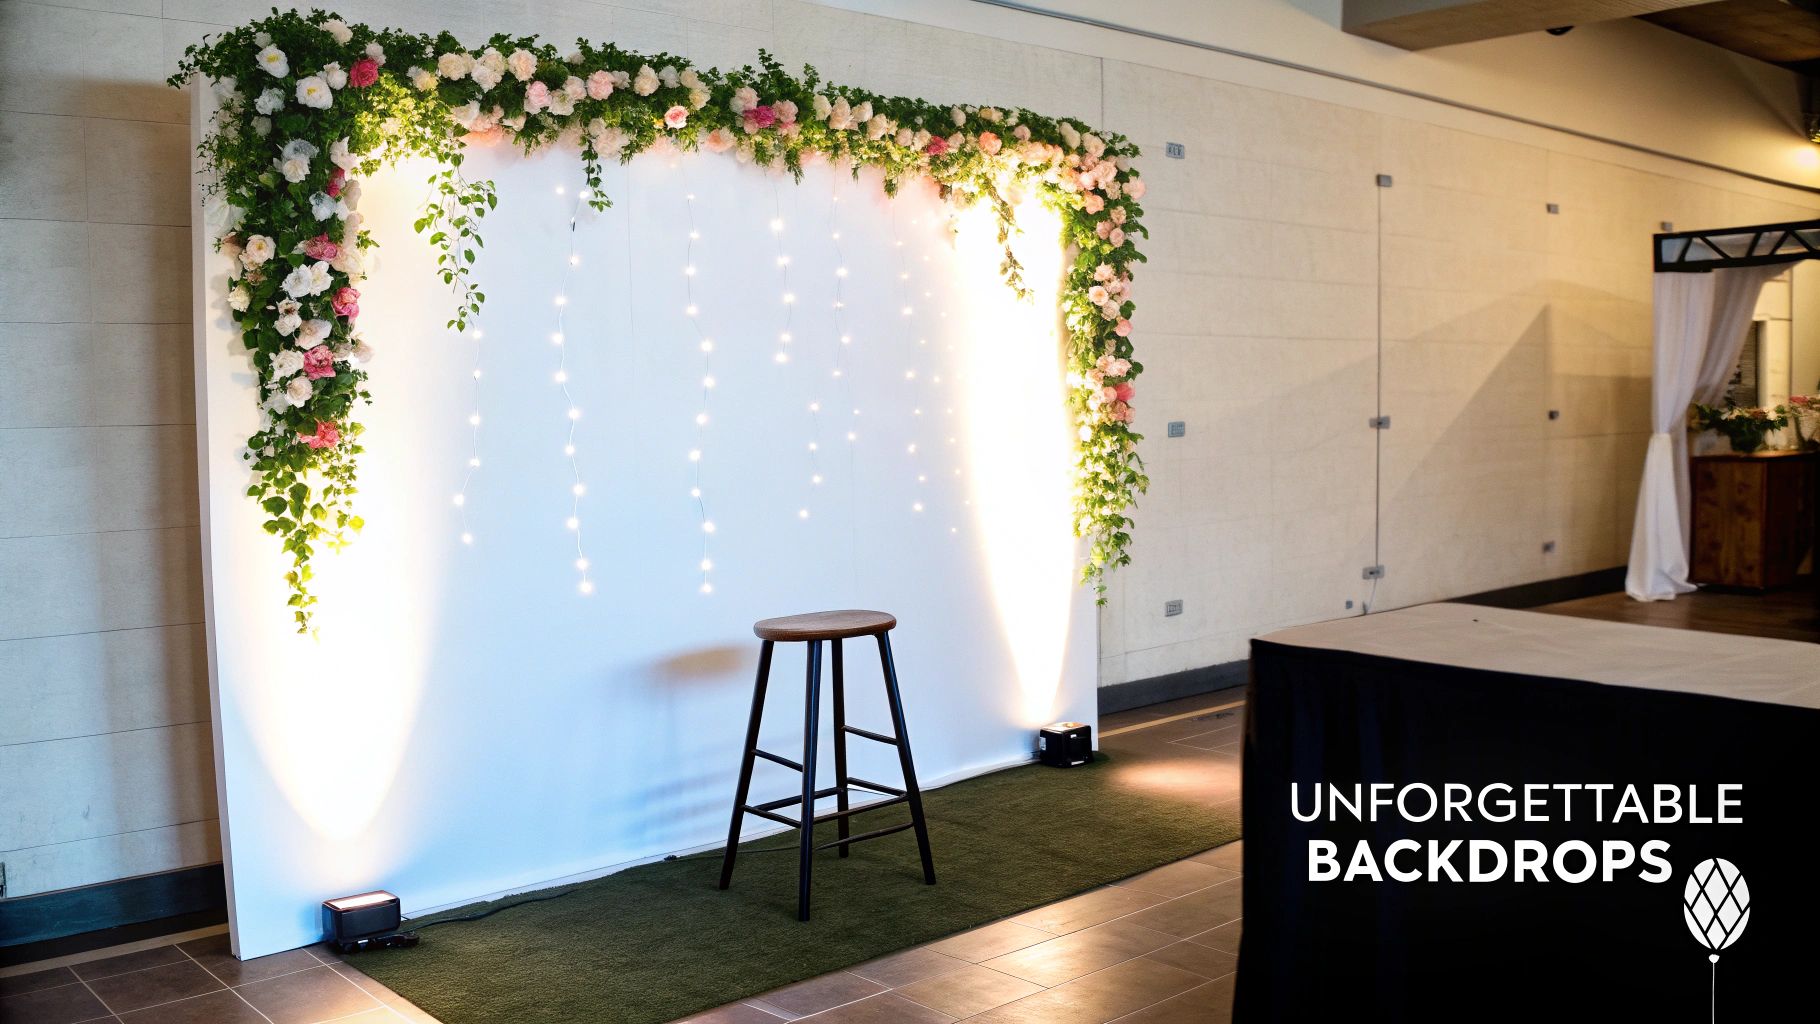
Let’s be honest, the real secret to a legendary photo booth isn’t just the camera—it’s the world you build behind your guests. A knockout backdrop can take a simple photo op and turn it into a full-blown experience, making your wedding or corporate do the one everyone’s still talking about weeks later. We can do so much better than a sad, limp sheet hanging in a corner. We’re talking about vibrant, interactive backgrounds for photo booth magic that ooze personality.
Why Your Photo Booth Backdrop Is Such a Big Deal
Think about the most glamorous events you’ve seen. Those incredible flower walls at Kim Kardashian’s wedding or the slick, branded backdrops at a film premiere with stars like Zendaya weren’t just thrown in at the last minute. They were absolutely central to the whole vibe. Your photo booth background plays the exact same role: it’s a statement piece.
Consider this guide your all-access pass to picking, designing, and putting up the perfect backdrop, guaranteeing every snap is picture-perfect and truly captures the spirit of your event.
Setting the Scene for Memories that Stick
A brilliant backdrop does so much more than just look pretty. It’s an invitation, a visual cue that draws people in and gives them permission to get a bit silly. The right background pulls your whole theme together and makes the entire guest experience that much better, turning a fun photo session into a real highlight of the night.
It’s a game-changer for:
- Nailing Your Theme: A romantic floral wall for a wedding? A dazzling LED screen for a big product launch? The backdrop is what hammers your event’s aesthetic home.
- Getting Guests Involved: An exciting or genuinely beautiful background is pretty much irresistible. You’ll have a queue of people eager for their shot, which creates a fantastic, lively buzz.
- Generating Social Media Gold: Let’s face it, we live on social media. A stunning backdrop means the photos people share online look polished and professional, giving your event a life of its own long after the lights go out.
And this isn’t just a fleeting trend. The demand for these kinds of interactive experiences is skyrocketing. The UK photo booth market was valued at a cool £42.69 million and is expected to almost double to £84.96 million by 2033.
A photo booth backdrop is the stage where your guests become the stars. It’s not just scenery; it’s an interactive part of the entertainment that shapes the visual memory of your entire celebration.
From lush flower walls to shimmering sequin panels, making the right choice turns every photo into a keepsake people will actually want to keep.
Alright, let’s dial up the personality and get this section sounding like it came straight from a seasoned event pro. Here’s a fresh take that ditches the robotic tone and gets right to the good stuff.
Finding the Perfect Material and Style for Your Event
Let’s be honest: your photo booth backdrop is so much more than just a wall. It’s the centrepiece of the action, the anchor for your event’s entire vibe. Get it right, and you’ve created an unforgettable experience. Get it wrong, and… well, let’s not go there.
Choosing the perfect material is what separates a forgettable snapshot from a photo that feels truly special. From a fairytale wedding to a high-energy corporate launch, the right backdrop doesn’t just complement your theme—it elevates it.
Matching Your Backdrop to Your Vibe
Think about the atmosphere you want to create. For that dreamy, romantic feel, you can’t go wrong with a lush flower wall. We’re talking about the kind of breathtaking floral installation you’d see at a celebrity wedding, like the one Hailey and Justin Bieber had. It adds texture, depth, and a timeless elegance that makes everyone look amazing.
But maybe “dreamy” isn’t your thing. If you’re going for full-on Hollywood glamour, a shimmering sequin wall is your best friend. It’s pure energy. Perfect for a milestone birthday or a glitzy New Year’s Eve bash, it catches the light with every flash and adds a dynamic sparkle to your photos. It’s the backdrop you could easily picture Dua Lipa striking a pose against at an exclusive after-party.
For a more natural, bohemian feel, a greenery wall is effortlessly chic. These living walls, often jazzed up with a custom neon sign, create an organic and trendy setting that’s a massive hit at relaxed weddings and brand events. You’re literally bringing the outdoors in, creating a fresh, vibrant space that just begs to be photographed.
Then you have the world of modern printed backgrounds for photo booth setups, where the only limit is your imagination. Got a super-specific theme, like an ’80s arcade night or a charming Parisian café? A custom-printed backdrop can transport your guests anywhere. This is your chance to get wildly creative, building an immersive world not unlike the elaborate sets seen at the Met Gala where Rihanna always makes a statement.
The best backdrop doesn’t just fit your theme—it is the theme. Think of it as the main stage for your guests’ best memories. Pick something that not only looks incredible but screams, “Come have fun with me!”
Photo Booth Backdrop Style Selector
Struggling to decide? This little chart should help you nail down the perfect match for your event.
| Backdrop Type | Best For | Vibe Check | Pro Tip |
|---|---|---|---|
| Flower Wall | Weddings, Bridal Showers, Engagements | Romantic, Elegant, Dreamy | Use a mix of real and high-quality silk flowers for a lush look that lasts all night. |
| Sequin Wall | Birthdays, New Year’s Eve, Corporate Parties | Glamorous, Fun, High-Energy | Pair with a ring light to really make those sequins pop and sparkle in every photo. |
| Greenery Wall | Relaxed Weddings, Brand Activations | Natural, Chic, Trendy | Add a custom neon sign with a catchy phrase or your event hashtag for extra personality. |
| Printed Vinyl | Themed Parties, Corporate Events, Product Launches | Customisable, Thematic, Immersive | The design is everything. Invest in high-resolution graphics to avoid a pixelated, cheap look. |
| Fabric Draping | Classic Weddings, Elegant Galas, Anniversaries | Soft, Timeless, Sophisticated | Check out different textures by exploring various woven fabrics to see what fits your vision. |
| 3D Elements | Experiential Marketing, Kids’ Parties, Creative Events | Interactive, Whimsical, Engaging | Keep it simple but effective. One or two key interactive props can be more powerful than a cluttered scene. |
This table is just a starting point, of course. The most exciting backdrops often mix and match elements, so don’t be afraid to experiment!
Beyond the Flat Wall
Don’t forget about texture and depth! Simple, elegant fabric draping can create a soft, classic backdrop that’s both beautiful and budget-friendly. The type of textile you choose here is key; a heavy velvet gives off a totally different vibe than a light, airy chiffon.
And if you really want to make a statement, you can’t beat 3D elements. These interactive backdrops go beyond a simple background, incorporating physical props, architectural shapes, or playful installations that guests can actually engage with. This turns the photo booth from a picture-taking spot into a genuine experience. It’s all about creating a moment of pure, unadulterated fun.
Mastering the Technical Side of Your Backdrop
Right, you’ve got a killer idea for your backdrop. Fantastic. But now comes the part that separates the pros from the amateurs: the technical stuff. Nailing these details is every bit as crucial as the creative vision. It’s what transforms a good idea into a genuinely flawless photo booth experience.
Let’s start with size and placement. Honestly, one of the most common blunders I see is a backdrop that’s just too small. You don’t want your guests squeezed together, only for the final photo to reveal the venue’s fire extinguisher and a messy pile of coats poking in from the sides. It completely shatters the illusion.
Think of it like the red carpet at a premiere. The photographers need a wide enough shot to capture an A-lister’s full outfit, like one of Margot Robbie’s iconic looks, without catching the chaos behind the barriers. Your backdrop needs to do the same for your guests.
Finding the Right Fit
A solid, professional backgrounds for photo booth setup is typically around 2.5 metres wide by 2.5 metres tall. This is the sweet spot for comfortably fitting groups of 4-6 people, meaning nobody gets their ear cropped out of the shot.
Before you lock anything in, always, always do these two things:
- Check the Venue’s Ceiling Height: Imagine turning up with a stunning backdrop that’s too tall for the room. Nightmare.
- Measure Your Floor Space: Make sure you have enough room for the backdrop itself, plus the lighting, the camera, and a bit of space for people to queue without causing a bottleneck.
This handy visual breaks down the typical backdrop choices for different event types.
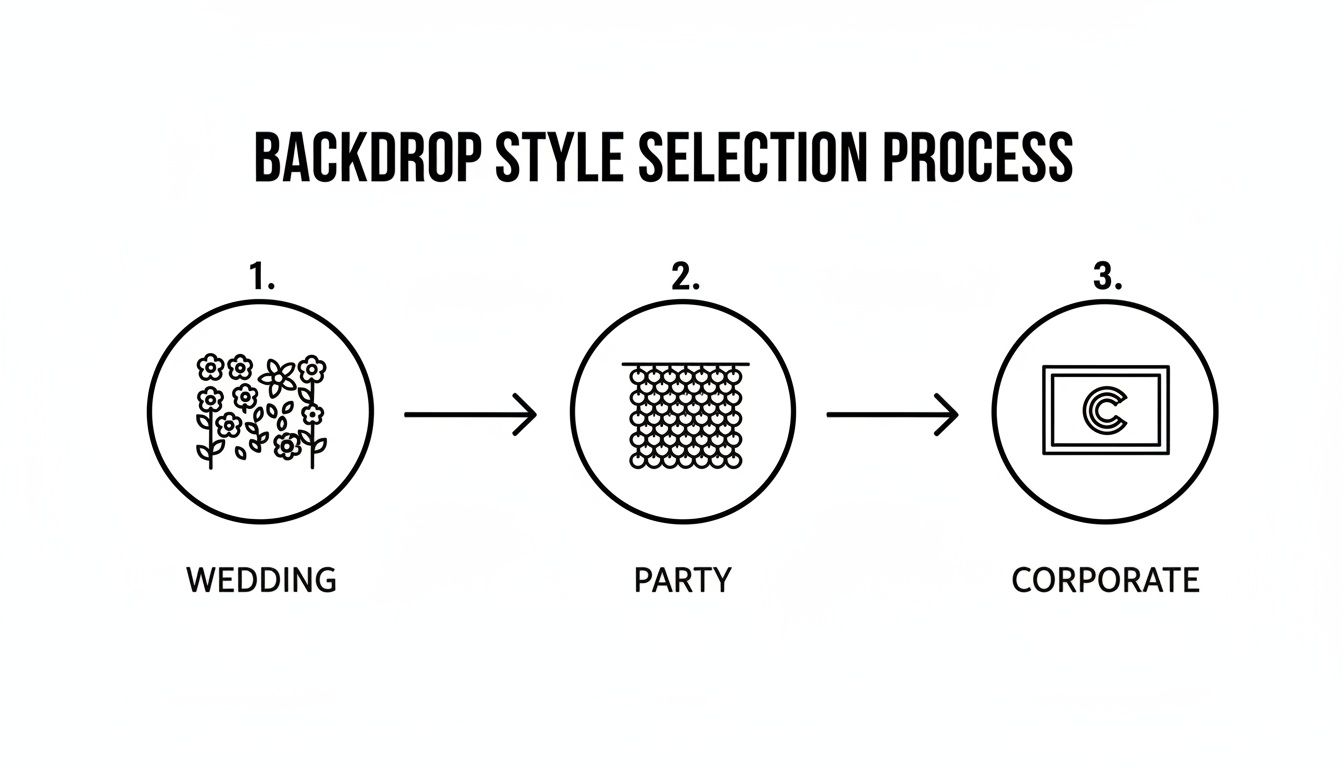
As you can see, matching the style to the event—a flower wall for a wedding, a branded step-and-repeat for a corporate do—is the first, most fundamental step.
Getting the Lighting Just Right
Now for the real magic ingredient: lighting. Let me be clear, great lighting is completely non-negotiable. It’s the difference between a flattering, glowing portrait and a shadowy disaster nobody will ever share. You don’t need a Hollywood film crew, but a little bit of planning makes all the difference.
For most setups, a simple ring light fitted around the camera lens does the trick beautifully. It provides soft, even light that banishes shadows and gives everyone that lovely sparkle in their eyes. If you want to step it up a notch, try two softboxes placed at 45-degree angles to the backdrop. This creates gorgeous, dimensional light that makes everyone look a million quid.
Key Takeaway: The single most important job for your lighting is to make sure your guests’ faces are beautifully illuminated. Bad lighting will ruin even the most spectacular backdrop.
Camera and Backdrop Interaction
Finally, let’s talk about how your camera plays with your backdrop material. This is especially important if you’re working with anything reflective, like a sequin wall. A direct camera flash can create nasty hotspots or blown-out highlights on shiny surfaces, which just looks cheap and unflattering.
To get around this, try diffusing your flash or angling your lights so they bounce off the sequins rather than hitting them dead-on. Taking a few test shots before the guests pile in is absolutely essential. Play with your camera’s exposure settings to find that perfect balance where the backdrop shimmers without completely overpowering the people in front of it. A few minutes of prep here guarantees every single photo comes out crisp, vibrant, and perfectly exposed.
Making That Photo Booth Backdrop Your Own
Let’s be honest, a generic, off-the-shelf backdrop is a huge missed opportunity. This is your chance to ditch the bland and create something that makes a real statement. A personalised background turns a standard photo booth into a bespoke experience—the kind that gets everyone talking and, more importantly, sharing.
For weddings, this is where the real magic happens. Just picture it: a custom neon sign glowing with your newly shared surname or wedding date. It becomes an instant, romantic focal point that’s going to be in every single snap your guests take. Think Kourtney Kardashian’s wedding bash—that’s the kind of memorable, shareable moment you’re aiming for. It’s an investment that pays off in every photo that hits social media.
And for corporate clients? A personalised backdrop is a branding goldmine. Stop thinking of it as just a pretty picture and start seeing it for what it is: a seriously powerful marketing tool.

Branding That Lasts Long After the Party Ends
The whole point is to weave your company’s identity into the fun so seamlessly that people don’t even realise they’re interacting with your brand. Plastering logos, event hashtags, or campaign slogans directly onto printed backgrounds for photo booth setups is a classic for a reason. It guarantees every photo uploaded becomes a mini-advert, pushing your brand’s reach far beyond the four walls of the venue.
Think of those iconic step-and-repeat backdrops at the Met Gala. Every single photo of celebrities like Taylor Swift or Harry Styles is basically free advertising for the event’s sponsors. You can channel that same energy, just on a smaller scale. For a more modern, high-tech vibe, digital projections are a slick option, letting you throw animated logos or rotating slogans onto a plain surface.
Your backdrop isn’t just a background; it’s a billboard. When guests share their photos, they should be effortlessly sharing your brand or story along with their smiles.
Get Creative, Whatever the Occasion
Personalisation isn’t just for weddings and big-budget corporate gigs. Any event can benefit from that unique touch that makes guests feel special and adds a tonne of value.
- Milestone Birthdays: How about a backdrop made from a collage of photos of the guest of honour through the years? Or maybe a fun, illustrated timeline of their biggest moments, just like the ones you see at a roast for a star like Kevin Hart.
- Product Launches: Create an immersive backdrop that transports people into the world of your new product. Launching a new perfume? A wall covered in the key floral ingredients would be utterly unforgettable.
- University Balls: Ditch the boring university crest. Use a green screen to whisk students away to famous world landmarks, or create a backdrop filled with inside jokes and popular campus slang.
At the end of the day, customisation shows you’ve sweated the details. It sends a clear message to your guests: this isn’t just another party; it’s an experience crafted just for them.
Deciding Between Hiring a Pro or Going DIY
Right, you’ve dreamt up the perfect backdrop. Now for the million-dollar question: do you roll up your sleeves and go DIY, or bring in the cavalry? This is the classic dilemma for event planners, and truth be told, there’s no single right answer. It’s all about what works for you and your event.
Hiring a professional service is your ticket to a stress-free, flawless result. You’re paying for a premium finish, expert installation, and top-tier materials without having to lift a single staple gun. It’s the A-list treatment; you get that jaw-dropping look you’ve seen at celebrity bashes, but without any of the behind-the-scenes drama.
On the other hand, a DIY backdrop can be a brilliant way to pour your heart and personality into your event, especially for smaller, more intimate gatherings. It’s your chance to get creative and make something truly unique. But, let’s be honest, it demands time, a bit of craftiness, and a solid, realistic plan.
The Big Decision Factors
Before you dive headfirst into a pile of glitter and glue, let’s get real about what matters. Your choice will almost always boil down to three things: your budget, your timeline, and your personal tolerance for a bit of organised chaos. A DIY project that looks cheap on paper can quickly get pricey when you factor in mistakes, and a “simple” idea can easily morph into a week-long construction headache.
If you’re really weighing up the pros and cons, this guide on DIY vs. Professional Prop Hire is a fantastic read. It digs into some of the hidden costs and time commitments that people often forget.
The choice between hiring and DIY isn’t just about money. It’s about what you value more for your event: complete creative control and a personal touch, or professional polish and total peace of mind.
To make things even clearer, let’s break it down with a simple checklist.
Hire vs DIY Backdrop Checklist
Deciding between hiring a pro and tackling a project yourself can feel overwhelming. This checklist is designed to help you figure out which path makes the most sense for your specific situation. Just run through the considerations and see where you land.
| Consideration | Hiring a Professional | Going DIY |
|---|---|---|
| Budget | You’ve set aside a decent budget for a high-impact feature and want a premium look. | You’re working with a tight budget and are happy to trade money for your own time and effort. |
| Time | Your schedule is already rammed, and you have zero spare time for a hands-on project. | You have plenty of time for planning, sourcing materials, building it, and setting it up on the day. |
| Quality | You need a guaranteed, flawless, professional-grade finish for a really important event. | You’re happy with a more rustic or homemade vibe and don’t mind a few charming imperfections. |
| Complexity | Your dream backdrop involves tricky elements like integrated lighting, heavy structures, or delicate materials. | You’re planning a fairly straightforward design, like a simple fabric drape or a balloon garland. |
| Stress Level | You want to eliminate event-day stress and let experts handle the logistics, setup, and teardown. | You genuinely enjoy a hands-on project and don’t mind managing the logistics and any last-minute troubleshooting. |
Be honest with yourself as you go through this list! A little bit of self-awareness now can save you a massive headache later on. Whichever route you choose, the goal is an amazing backdrop that makes your guests smile.
Right, you’ve chosen a killer backdrop. Now for the make-or-break moment: getting it set up and taken down without a single hitch. This is where the magic really happens, and a little bit of prep goes a very long way.
Think of it as your pre-flight checklist. Whether you’ve brought in the pros or you’re rolling up your sleeves to DIY, having a plan separates the seasoned pros from the panicked amateurs.
The Pre-Event Recce
Don’t just show up on the day and hope for the best. A few days before, you need to get your ducks in a row.
- Confirm with the Venue: Double-check the exact space you’ve been allocated. You’ll need the dimensions, of course, but also look for things like uneven floors or low-hanging light fixtures.
- Power Socket Hunt: Where are the plugs? Are they close enough, or will you need an extension lead? And for goodness sake, make sure you’ve got one that’s long enough!
- The Tool Kit: Lay out every single thing you’ll need. Gaffer tape, a spirit level, cable ties, scissors… Pack it all. Being caught without the right tool is a classic rookie error.
Showtime: The Grand Assembly
On the day, resist the urge to rush. A methodical setup is a smooth setup.
Start with the frame. This is the skeleton of your whole operation, and it needs to be rock-solid. Give it a good shake once it’s up – no wobbles allowed!
Next, attach the backdrop itself. This is a two-person job if you want it done right. Gently stretch the fabric or material as you attach it to get rid of any pesky wrinkles or creases. A saggy backdrop just screams amateur hour.
Finally, position your camera and lighting. This is the final, crucial touch. Test it out, take a few sample shots, and adjust until every picture looks absolutely flawless.
A wobbly frame or a wrinkled backdrop can ruin the entire photo booth illusion. Seriously, take an extra ten minutes here. Your future self, calmly sipping a drink while guests snap perfect photos, will thank you for it.
The Aftermath: Packing Down Like a Pro
When the last guest has stumbled home, your job isn’t quite done. A systematic pack-down is just as important as the setup. It prevents damage and makes your next event a thousand times easier.
Carefully detach the backdrop and fold or roll it according to its material. Dismantle the frame piece by piece, and – this is key – put all the little nuts and bolts into a labelled bag. Future you will be eternally grateful.
Photo Booth Background FAQs: Your Questions Answered
Even the most seasoned event planners have those last-minute “what if” moments. When it comes to photo booths, a few questions seem to pop up time and time again. Let’s get them answered so you can focus on creating that picture-perfect experience.
What’s the Best Size for a Photo Booth Backdrop?
The sweet spot for most photo booth backdrops is around 2.5 metres wide by 2.5 metres tall.
This size is a real crowd-pleaser. It’s generous enough to comfortably frame groups of 4-6 people without anyone getting cropped out or accidentally showing the backdrop stand in the shot. If you’re planning a massive party and want that grand, open-air feel, you could push it to 3 metres wide.
Just a quick pro tip: always, always double-check the ceiling height at your venue before you commit to a giant backdrop. Nothing worse than realising it won’t fit on the day!
How Do I Make My Backdrop Look Genuinely Professional?
Getting that slick, professional finish all comes down to a holy trinity: materials, lighting, and stability.
First, choose a high-quality, non-reflective material. This is crucial for avoiding that awful, amateur-looking camera flash glare that can ruin a photo. Next, make sure your backdrop is pulled completely taut and is wrinkle-free. A handheld steamer is an absolute lifesaver for this – don’t leave home without one.
But the real secret weapon? Lighting. You can have the most beautiful backdrop in the world, but bad lighting will kill the vibe. Investing in a good ring light or a pair of softboxes creates that soft, flattering glow that makes everyone look like a superstar and gives your photos that high-end polish.
A green screen is another fantastic and incredibly versatile option. It lets you digitally drop any image you want behind your guests, opening up a universe of creative possibilities. You could transport them to the Eiffel Tower, put them on the red carpet with Blake Lively, or place them inside a custom-branded world.
This magic trick does require special photo booth software with ‘chroma key’ capabilities. It’s a common feature offered by most pro hire companies, so it’s definitely worth asking about if you want to give your guests a truly unique and interactive experience.